
Spinner Easel
Tutorial Materials Needed
1 piece of Colored Cardstock 5”x10” for Card Base
1 piece of Colored Cardstock 5”x 5 ½” for Card Base (Same color as above piece)
1 piece of Colored Cardstock 5”x5” for Inside of Card
1 piece of Matching Pattern Paper 5”x 5”for Inside of Card
1 piece of Colored Cardstock 2” x 4” for Sentiment inside of
Card
1 piece Colored Cardstock 5”x 5” for matting on front of card
1 piece of Matching Pattern Paper 5” x 5” for front of card
2 pieces Colored cardstock for Spinner (This will be made out of scraps later)
1 piece Pattern Paper for Spinner (This will be made ot of scraps later)
1 piece of nylon (fishing line) cord 5 inches long
1 image of Hedgehog sized to 2 ¾ inches horizontally, colored and fussy cut the image.
Small tag and flowers for embellishments on card bottom to
use as card stop.
Bow, rhinestones for embellishing.
Cardstock for card base measurements.


Layer one 5” piece of cardstock and one 5” piece of pattern paper on top of 10” cardstock being used for card base. This will be the front of your card. Be sure you have three thicknesses of paper layered evenly on three sides with 5 inches of the cardstock being used for the card extending out on one end which will be the back of the card when finished.

Save the scalloped pieces for use later.

Cut two 3" inch circles out of cardstock and cut one 3 inch circles out of the 3 ½” scalloped piece. If you cut all three at once it is easier.

Use the two 3 inch
circles of cardstock, pattern paper and your Hedgehog cut out in this step.
Stamp a sentiment on one circle. Turn this circle over and put a piece of
score tape down the center of the circle (the diameter) and adhere the cord (nylon fishing line) down the center leaving an equal amount overhanging on each end. Adhere the second circle of cardstock to the cardstock with cord being sure the cord is well glued and the paper is even on
all edges. Adhere the patterned paper on
cardstock circle and place the Hedgehog image in the center of the Pattern paper.
***** Be sure the
cord is exactly in the middle/center of the circle. When this step is
completed, the image should be straight vertically if you hold the cord on each
end.


If you look closely in the center where I have a mark you will see the cord.

Of course I didn't notice I had mine upside down when I posted it on here :))
Cardbase Instructions
Use Score Tape on ½” flap and attach to edge of cardbase at
opposite end from cut out, adhering flap to inside.

Front of card:
Take one piece of the colored cardstock with cutout and trim
1/16th inch off each side.
This will allow the cardstock being used for the card to show as a mat.
Take the Pattern paper with cutout and trim 1/8th
inch off each side. This will allow the second
piece of cardstock to show as a mat.
Adhere the patterned paper to cardstock leaving an equal
amount of cardstock showing on all edges as a mat.

Using Score Tape, place a piece of the tape on the back of the cardstock exactly in the center on the top and the bottom of the cut out.
Place your circle with the image in the scalloped opening and Be sure everything is centered so the circle with the image will turn and not touch anything. Adhere the cardstock and pattern paper to the card front cardstock being sure the cord is firmly attached and pull both ends of the cord to tighten. Cut off excess cord.
Place your circle with the image in the scalloped opening and Be sure everything is centered so the circle with the image will turn and not touch anything. Adhere the cardstock and pattern paper to the card front cardstock being sure the cord is firmly attached and pull both ends of the cord to tighten. Cut off excess cord.
Put adhesive on colored cardstock and glue to back of card on inside to embellish.
Put adhesive on Pattern paper and glue to inside bottom
section and place the 2" by 4" piece of cardstock with a sentiment if desired.
Adhere flowers and tag on front edge of bottom section.
Put ribbon on top front of card.
Put rhinestones in flower centers.
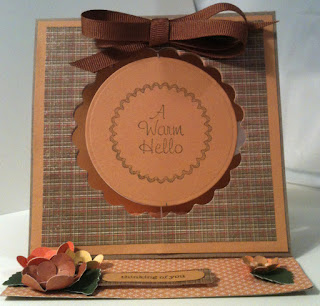
You can now stand your easel card up resting the front against the flowers, tag, etc., and your image should turn and not touch the scalloped opening.
This is the card the original card I had made .

If you have any questions, please feel free to contact me at The Crafty Pad.
Happy Scrappin'
Hugs,
Joanie
You can now stand your easel card up resting the front against the flowers, tag, etc., and your image should turn and not touch the scalloped opening.
This is the card the original card I had made .


If you have any questions, please feel free to contact me at The Crafty Pad.
Happy Scrappin'
Hugs,
Joanie
No comments:
Post a Comment